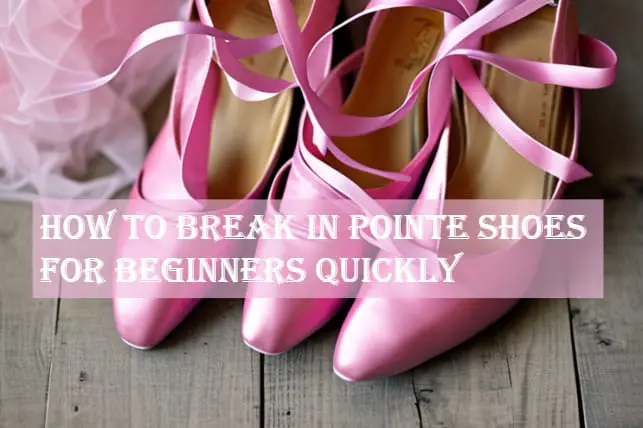
As a ballet dancer, one of the most exciting milestones is when you get to start dancing on pointe! Pointe work represents a new level of grace, beauty and skill. But before you can float effortlessly across the stage en pointe, there’s an important process you must go through to properly break in your new pointe shoes.
Improperly broken in pointe shoes can lead to blisters, bunions, and even injuries like sprained ankles or stress fractures. That’s why it’s so important to take the time to properly break in your first pair of pointe shoes. Follow these tips to help make the transition as smooth as possible.

Understand the Anatomy of Pointe Shoes
Pointe shoes have a very specific structure to allow dancers to balance on the tips of their toes. Being familiar with the different parts of a pointe shoe will help you understand how to break them in. Here are the main elements:
The Box – This is the rigid toe area that covers and supports your toes en pointe. It is made from layers of fabric, cardboard and/or paper that have been glued together and shaped. The box is what allows you to have a solid platform on which to balance.
The Shank – This is the part underneath the arch of your foot. It is a piece of rigid material that provides stability and structure.
The Vamp – The vamp is the part that fits over the top of your foot. It may be made from canvas, leather or a synthetic material.
The Sole – A thin piece of leather or rubber on the bottom of the shoe.
The Rib – A fabric reinforcement that runs along the edge of the shoe beneath the sole.
The Drawstring – The drawstring threads through eyelets along the throat (ankle opening) of the shoe to secure it around the dancer’s foot.
Knowing what each part is called will make it easier to follow pointe shoe break-in tips.
How to Break in Pointe Shoes Easily

Follow these essential tips to break in your first pair with comfort and ease.
Select the Right Size
Getting the appropriate size pointe shoes is essential for proper break-in. Pointe shoes that are too big or too small can cause issues.
When you get fitted for pointe shoes, the fitter will measure both the length and width of your feet. Pointe shoes usually fit very snugly, almost like a second skin. You want your toes to be able to slightly grip the edge of the box when your knees are bent to help stabilize you on relevé.
The pointe shoe ribbons should be taut when crisscrossed and tied to anchor the shoe securely. There should not be any major gaps along the heels or sides. Your toes should also not be painfully squished together. A small amount of pressure is normal, but excessive cramming can cause damage.
Make sure to get re-fitted every 6 months to a year as the feet change. Don’t just assume you are still the same shoe size. improper fit will make it much harder to break in pointe shoes correctly.
Bend the Shank
The shank of a brand new pointe shoe will be extremely rigid. The hard, unbending shank will not allow your foot to roll through demi-pointe properly. This can put excessive pressure on the bony prominences of the foot.
To avoid pain and make demi-pointe more comfortable, bend back the shank before wearing the new pointe shoes. Here’s how:
- Put the shoes on. Make sure that the drawstring ribbons are tied to duplicate the snug fit you’ll use when dancing.
- One at a time, place each shoe flat on the floor. Press down on the box to flatten the shoe against the floor as much as possible. Apply firm pressure with your hands to maximize the bend of the shank.
- While pressing down, also flex your foot up and down several times. The combination of the pressure and foot flexion will help soften the shank.
- Repeat this shank bending process 3-4 times per shoe.
Gradually bending the shank over multiple sessions will help prevent it from cracking or breaking. The shank should become more flexible, allowing it to match the bend of your arch better.
Soften the Box
The box is the rigid toe area that has to support your full body weight on the tips of your toes. So naturally, a brand new pointe shoe box will be extremely hard and unforgiving.
Slowly softening and molding the box to match the shape of your feet is crucial for reducing pain when dancing en pointe. Follow these key steps to help soften the box:
- Break it in off your feet first. Grip the shoe by the heel and flex the box back and forth repeatedly to weaken the glue. Press down on the platform to flatten it slightly. The cardboard will gradually loosen up and soften.
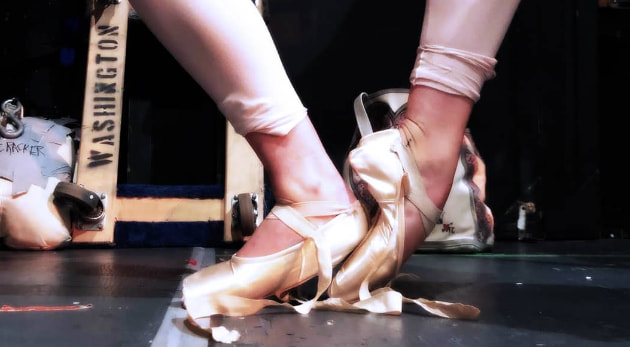
- Wear the shoes for short non-dancing periods. Put the pointe shoes on with the ribbons tied securely. Then walk around on your knees for a few minutes, pressing down through the boxes. The weight of your knees will help indent the platform without overdoing it.
- Roll through demi-pointe. Rise up demi-pointe, hold for a few seconds, then roll back down. The pressure from your foot arches will further mold the box. Repeat several sets of demi-pointe rolls.
- Dance in them briefly. Once the box feels somewhat broken-in, try doing simple relevés in the shoes. Start with only a few repetitions. This will allow your foot to apply targeted pressure right before going en pointe.
- Custom pad as needed. Use foam pads, lambs wool, gel pads or custom orthotics to provide extra cushioning and support in spots that feel uncomfortable. This protects bony areas vulnerable to irritation.
Be patient and break in the box gradually. Rushing this process can damage the shoes.
Increase Flexibility of the Upper
The upper part of a pointe shoe is constructed from a canvas-like fabric. When new, the vamp will feel extremely stiff and unyielding. It takes time to soften and conform it to your unique foot shape.
To break-in the vamp, begin by manually manipulating it with your hands:
- Gently press along the edges of the vamp to flatten and widen it. Avoid creasing the fabric sharply.
- Roll the vamp back and forth to weaken the glue attaching it to the shoe interior.
- Curve the vamp in demi-pointe by bending back the box and pressing down.
- Gently tug at the back seam of the vamp near the drawstring to loosen it.
Once the upper feels slightly more pliable, put the pointe shoes on and continue:
- Rise up into demi-pointe, stretching out the vamp material across your arch. Hold briefly, then lower with control.
- Place one knee on the floor, foot extended en pointe. Sink your weight into the knee to indent the vamp beneath your arch.
- With your foot flat on the floor, flex and point to move the vamp material back and forth.
The upper will mold to your foot as it softens up. Avoid over-stretching which can tear the delicate material.
Double-check the Fit
As the shoes begin to break in, the fit will change. The box widens and flattens slightly, the shank becomes more flexible, and the upper stretches and softens.
After several wearings, re-examine the pointe shoe fit and make any needed adjustments:
- The ribbons may need tightening as the upper stretches and conforms to your foot. Make sure they still feel snug when tied.
- Use small pieces of tape to take up any gaps that develop along the heels or sides if the shoes become loose.
- Try using the shoes without padding once broken in. You may find you need less cushioning as the box softens.
- If your toes feel compressed in an area, use a shoe stretcher or push back the shoe fabric from inside the box for targeted relief.
- Have a teacher re-check your pointe shoe alignment to make sure the shoe isn’t twisting or leaning to one side.
Continue reassessing the fit until the shoes feel like a natural extension of your feet. The snugger the pointe shoes fit, the better your balance and technique will be en pointe.
Others Break-In Tips and Tricks
Here are some additional pointe shoe break-in tips that can help speed the process along:
- Always break in two pairs at once. This gives each pair adequate rest between wearings.
- Beat the shank against a hard surface like a table to soften it faster. Knocking it repeatedly will help weaken the glue.
- Use a door jamb to quickly bend back the shank. Close the door on the shoe and press against it.
- To stretch the vamp, spray it lightly with water or alcohol before wearing. As it dries, it will tighten up.
- For faster softening, use a hair dryer on a low setting to heat the glue layers of the box. Apply in short bursts, checking the temperature.
- Fill plastic bags with water and freeze them. Place the frozen bags inside the toe box for 5 minutes to dampen the glue before dancing.
- Avoid synthetic satin shoes for your first pointe shoes. Canvas or leather conforms to your feet faster.
Pointe Shoe Maintenance
Caring properly for your pointe shoes will help maximize their lifespan. Here are some pointe shoe maintenance do’s and don’ts:
- Allow pointe shoes to dry fully between wears. Stuff with tissue to absorb moisture and maintain the shape.
- Sew ribbons and elastics back on securely at the first sign of fraying. Don’t wait until they detach completely.
- Don’t walk on sidewalks or rough surfaces in pointe shoes which wears down the box.
- Use clear nail polish on spots where the glue is coming undone to re-adhere the layers. Avoid superglue which dries rigidly.
- Spot clean stained shoes gently with a lightly damp rag. Don’t immerse in water, which can ruin the glue.
- Don’t dry pointe shoes in direct heat or sunlight which can crack the box. Air dry only.
- Carry shoes in a protective case or bag when transporting them to avoid damaging the toes.
- Plan to get new pointe shoes 3-4 times per year minimum, depending on frequency of wear.
With the proper care and maintenance, your first pair of well-broken in pointe shoes can last longer and support many beautiful dances en pointe.
Conclusion
Breaking in your first pair of pointe shoes properly is extremely important for your comfort and safety en pointe. While it does take some time and effort, remember to be patient and advance gradually. Avoid taking shortcuts that could lead to injury or damaged shoes.
Start by understanding the key parts of pointe shoes and how they relate to your feet. Always get professionally fitted and buy an appropriate width and length. Gently bend the rigid shank, soften the hard box, and stretch the unyielding upper material.
Make sure you get two pairs of shoes so you can rotate wears to optimize the break-in process. Carefully monitor for fit changes during the break-in period. And remember to maintain your new pointe shoes well with sewing, drying, cleaning and replacement as needed.
If you invest the time upfront to break in those beautiful new satin pointe shoes correctly, you’ll be rewarded with many future dances en pointe that make you look and feel like the prima ballerina you’ve always dreamed of being! So treasure this special time, and let those shoes carry you gracefully across the stage in all your future ballet adventures.
Frequently Asked Questions about Breaking in Pointe Shoes
What is the best way to break in the box?
Bending and flexing the box with your hands, combined with rolling up into demi-pointe and wearing them briefly for non-dancing activities works well. Go slowly to gradually indent the platform without cracking it.
Do I need to wear toe pads?
You may opt to wear gel pads or lambs wool on blister-prone areas as you break in new shoes. Once the box softens fully, you may be able to dance without pads. Let your comfort level guide you.
How can I stretch the elastic if it is too tight?
You can stretch the elastic by gently tugging it top to bottom behind the heel. Never pull the elastic horizontally, which can damage it. If it remains too tight after stretching, the shoe may be the wrong size.
Why do I need two pairs of pointe shoes?
Having two pairs and alternating them allows each pair to rest and dry out fully between wears. This extends their lifespan. It also allows you to have a backup pair in case of emergency issues with the other.
Will soaking my shoes help break them in?
Do not soak the shoes entirely in water, as this can break down the glue. You can dampen small areas of glue with ice packs or alcohol and it may help loosen things up. But avoid prolonged soaking.
How do I get a good shank bend?
Press firmly down through the platform to flatten the shoe, while flexing the foot up and down. Use your full body weight when bending the shank. Repeat several times on a hard floor for best results.
What if my shoes are too loose after breaking in?
If the shoes become loose once broken in, you can tighten the drawstrings. Also use small pieces of tape on the sides or heels to take up any gaping that develops as they conform to your feet.
Following the proper break-in protocol will get your pointe shoes ready for dancing in no time! It is well worth the effort and patience.


