In this tutorial, we will show you how to make a fascinator hat using basic materials like a headband, wire, feathers, and other decorations.
We will also provide some tips on how you can make a fascinator with a veil, tulle, net or add more intricate details to your design.
Finally, we will answer some of the frequently asked questions about making fascinators so you can make your own unique headpiece with confidence. So let’s get started!
How to Make a Simple Fascinator Hat
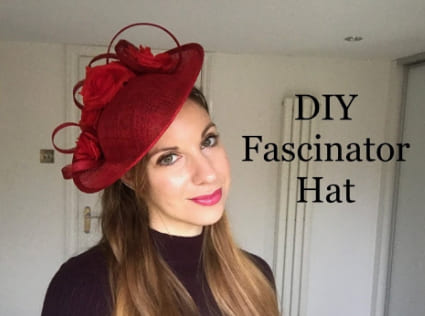
Making a simple fascinator hat is a great way to add a touch of glamour and elegance to any outfit. Whether you are attending a formal occasion or just want to add a bit of flair to your look, a fascinator can be just the thing. Here’s how to make your own:
1. Gather your supplies. You will need a piece of fabric or ribbon, scissors, and some thread. If you plan to make a veil, you will also need some tulle or netting.
2. Measure and cut the fabric or ribbon into a circle, making sure it is wide enough for your head.
3. Fold the fabric or ribbon in half, then in thirds, and sew the sides together with thread.
4. Now you have your basic fascinator shape! You can either leave it plain or add embellishments such as silk flowers, feathers, or ribbons.
How to Make a Fascinator Hat with Veil
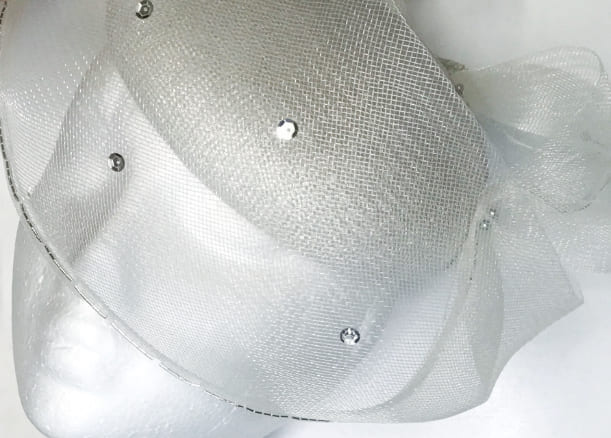
If you are looking for a unique and stylish way to accessorize your outfit, why not try making your own fascinator hat with veil? Making your own fascinator hat with veil is a fun and creative way to make your outfit stand out. Here is a step-by-step guide on how to make this beautiful accessory.
After gathering the supplies, measure and cut the tulle fabric. Measure the circumference of the hat base and then cut the tulle fabric to be slightly larger than this measurement.
Pin the fabric to the hat base. Start by pinning the fabric at one side of the hat and then wrap it around the circumference of the hat. Secure all the pins along the edge of the hat base.
Trim the fabric to the desired shape. You can choose between a rounded or pointy shape.
Secure the edges of the fabric with fabric glue. Make sure to apply enough glue to ensure that the fabric is securely attached to the hat.
Cut a length of thin ribbon and attach it around the edge of the hat base with fabric glue. This will give the fascinator an elegant finishing touch.
Place the veil on top of the hat base and adjust it to your desired position. Secure it in place with more pins or fabric glue.
Your fascinator hat is now complete! Enjoy your stylish new accessory!
How to Make a Fascinator Hat with Headband
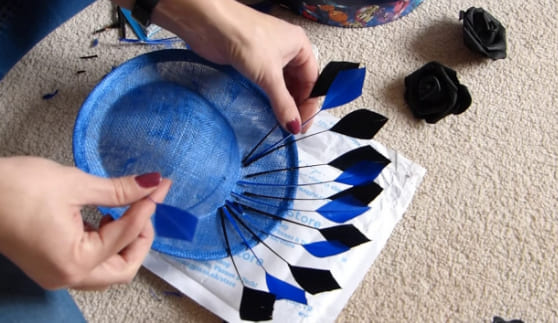
Making a fascinator hat with a headband is a fun and creative way to add a unique touch to any outfit. To get started, you will need a few supplies including felt, a headband, scissors, and glue. First, cut the felt into the desired shape of your fascinator.
You may want to look up some ideas online or in magazines to get inspired. Once you have your shape, use the glue to attach it to the headband.
Allow ample time for the glue to dry before wearing your fascinator. With some creativity and patience, you can make a beautiful fascinator hat with a headband.
How to Make Fascinator with Net?
Making a fascinator with net is a fun and easy craft project that can be done in a few simple steps. First, you will need a wide net. This can be any size, but should be wide enough to cover your head. Next, you must take the crown of the net with your left hand, also known as the “yoke”. Then, gather the material in your right hand and begin to form it into a headpiece shape.
Once the desired shape is achieved, secure the headpiece by weaving the material together or sewing it together. Finally, finish by adding decorations such as ribbons or feathers to create the desired look. With these steps, you will have a stylish fascinator with net in no time!
How to Make a Wedding Fascinator
Making a wedding fascinator is a great way to add a unique touch to your special day. To make a wedding fascinator, you’ll need to follow one of the steps listed above to get the job done.
How to Make a Fascinator with Tulle
Making a fascinator with tulle is a fun and creative project that will leave you with a stylish and unique headpiece. First, you’ll need to select the type of tulle you want to use. You can find tulle in colours, patterns, and textures in craft stores or online.
Then, you’ll need to measure the circumference of your head and cut a piece of tulle to fit. Once the tulle is cut, you can begin to create the shape of the fascinator. You can use hot glue or fabric glue to attach the tulle in place.
Once the basic form of the fascinator is created, you can add embellishments such as feathers, beads, or other decorations. Finally, attach a comb or clip to the back of the fascinator so it can be secured to your head.
Bottom Line
Creating a fascinator hat is a fun and creative way to make a fashion statement. With a few materials such as buckram, feathers and glue you can make a sinamay hat with a veil or a headband in no time. To keep your hat in shape and make it last longer, you will need to strengthen the base of the sinamay by making a circle with wire, cutting and sealing the edges together.
Frequently asked questions
What supplies do I need to make a fascinator hat?
You’ll need wire, Uhu gum, bias, mesh net in the desired colour of your choice, petal, and feathers. Most of these things can be bought at grocery stores or stores selling sewing materials.
What type of clip do I need to attach my fascinator?
The most popular choice is a standard beak hair clip or alligator clip. This is because they are quick and easy to use and can be adjusted for different hairstyles.
What skills do I need to make a fascinator?
Important techniques for making hats are taught, along with tips on how to make your hats as modern or traditional as you want. Anyone can learn how to make a fascinator hat if they work at it.
Are there any tips for picking the right size hat?
For most adult heads, a crown height between 5 and 6 inches is usually the right size.
How long does it typically take to make a fascinator hat?
The timeframe for making a fascinator hat varies depending on the complexity of the design but it typically takes between 1-4 hours from start to finish.

